How to make an old-school whirligig fidget toy
We know fidget spinners are all the rage right now, but we’ve actually been playing with fidget toys for generations! Show your kids an old-school way to have fun with a classic whirligig. The best part: hours of fun, (annoying) sound free! Hello summer road trips.
Difficulty: The craft is easy, while the spinning is tricky but fun to learn
Age range: 4+ with some grown-up help
Safety first: Kids will need help poking holes and using scissors (safety scissors aren’t quite strong enough)
The takeaway: The cardboard surface is a great blank canvas for creative designs. As it spins, the colours seem to disappear in a very cool optical illusion.
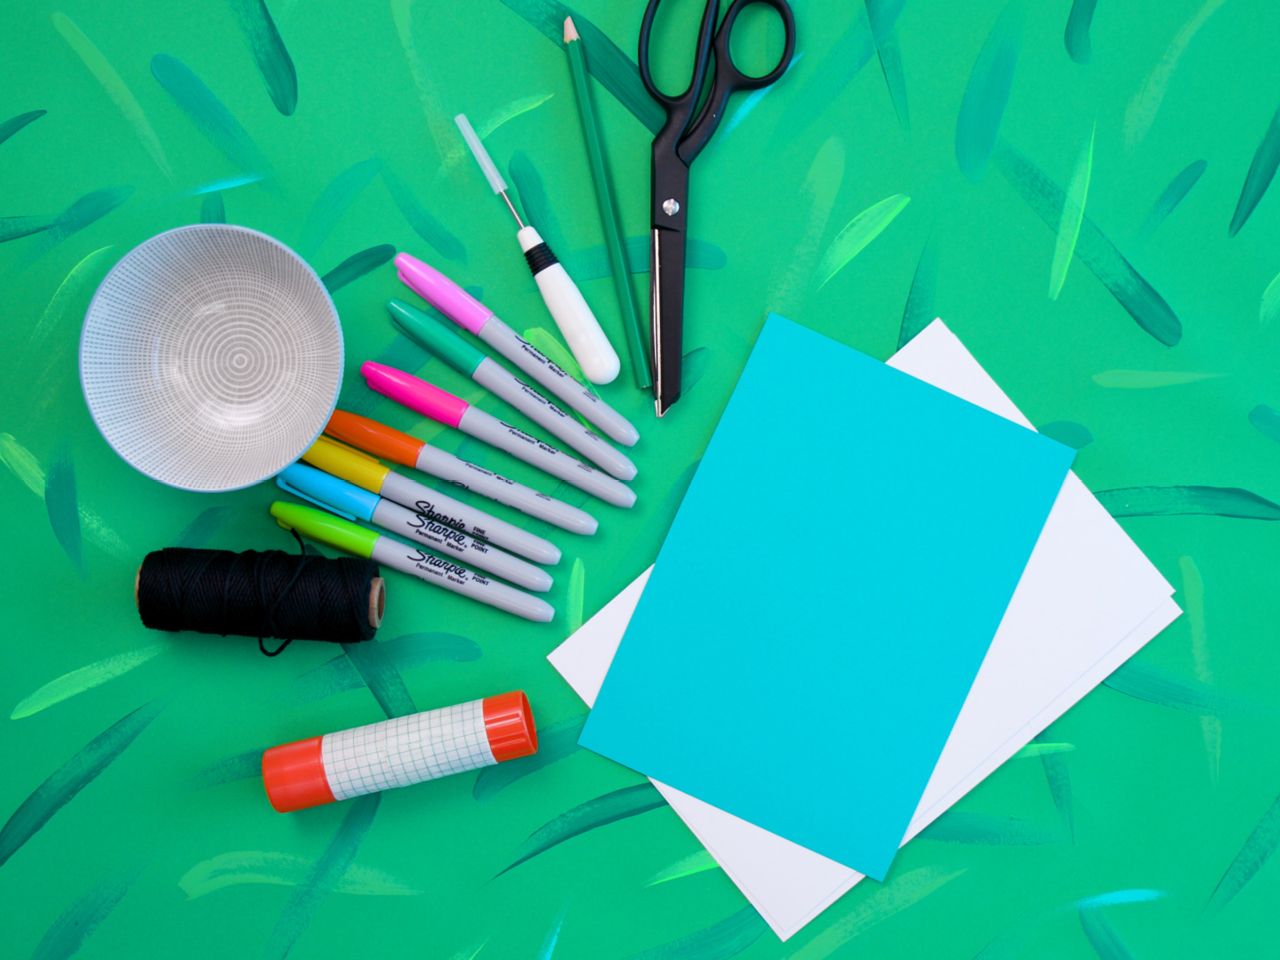
You’ll need:
3 pieces white card stock (you can use coloured card stock, too)
scissors
pencil
awl (or something sharp to poke holes)
markers (washable are totally fine)
small bowl to trace
twine or string
glue stick
Step 1
Trace one circle on card stock (we used a small, 4-in bowl) and roughly cut it out around (not on) your traced line.
Step 2
Glue your circle to another piece of card stock. Flip it over and glue a third piece of card stock to the second piece. Flip it over again and cut carefully along the traced line on your circle. Now it’s thick and sturdy and ready to go.
Step 3
Draw any design on the face of your whirligig spinner. Try a different design on the back. And don’t be afraid to use lots of colours.
Step 4
Using your awl, poke two hole...
| -------------------------------- |
|
|